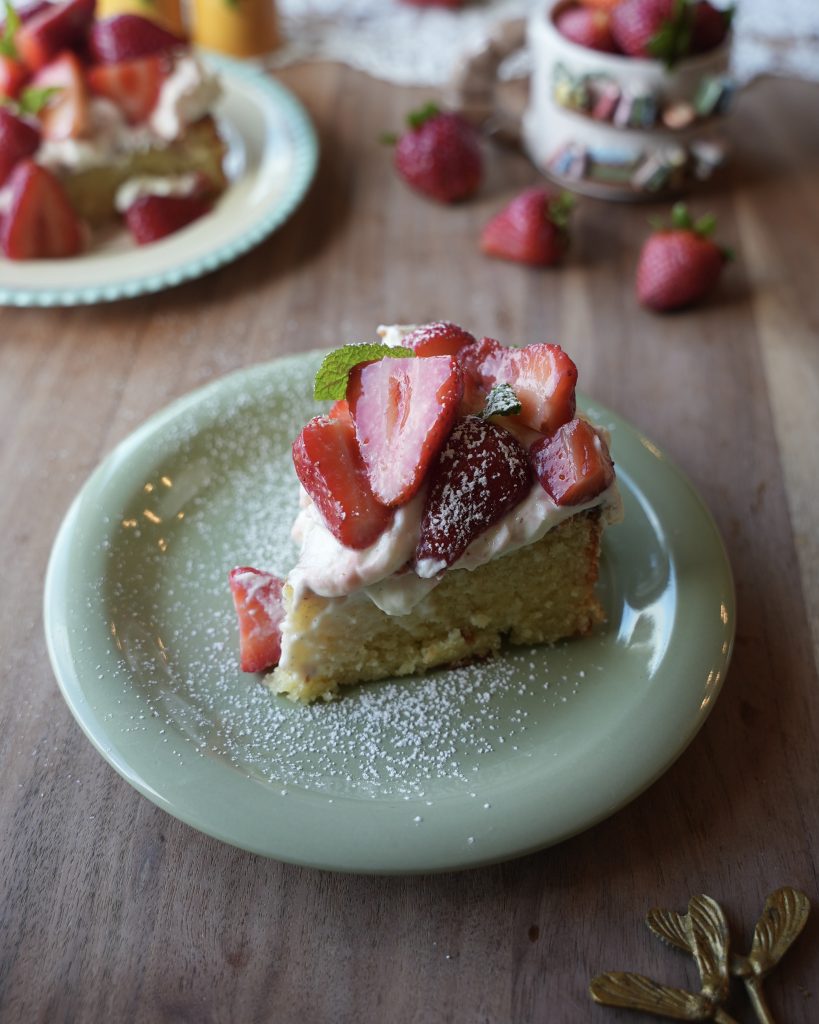
Strawberry-Biscoff Cheesecake Cups
Here’s a perfect summer dessert that’s fresh, easy, and no-bake! The blend of strawberries and Biscoff is simple yet delicious—great for any gathering.
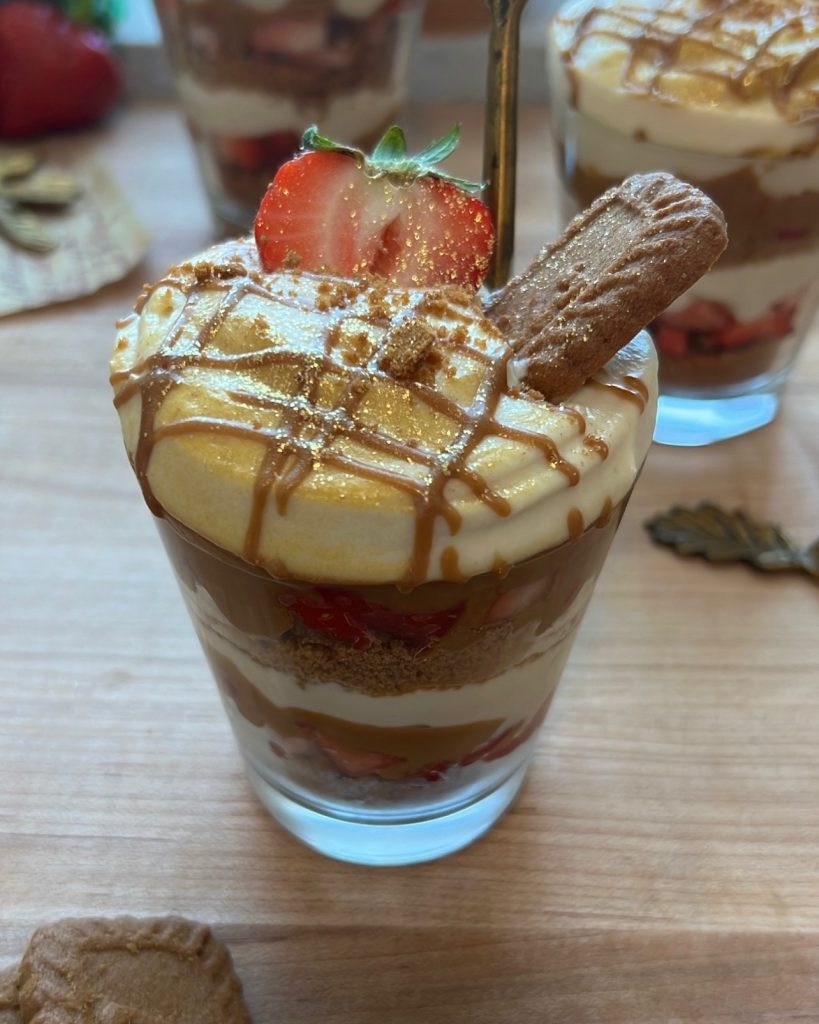
Today we’re making Strawberry-Biscoff Cheesecake Cups! This is one of my all-time favorite recipes to whip up for gatherings, and it’s perfect for a warm, sunny day. The combination of creamy cheesecake filling, crunchy Biscoff, and fresh strawberries is incredibly satisfying. The flavors blend together so seamlessly, creating a sweet, and fresh dessert.
Here’s a video to guide you along the process:
Few tips:
- When you’re beating the whipped cream in a large bowl or stand mixer, watch for stiff peaks to form—this usually takes about a minute, though timing can vary a bit. Be careful not to over-mix!
- You can adjust the sweetness in these dessert cups by adding more or less powdered sugar. For me, this recipe has just the right balance, but feel free to tweak it to your taste.
- Not necessary, but If desired; Transfer the mixture to a piping bag for presentation. Or simply, evenly divide the mixture among the cups and spoon it in for a simpler approach.
- Once everything’s prepped, cover the cups and chill them in the fridge for at least an hour before serving (I love making them the night before). Chilling gives the flavors time to come together and helps the filling set nicely. The colder they are, the better they taste!
Process:

Strawberry-Biscoff Cheesecake Cups
The combination of creamy cheesecake filling, crunchy Biscoff, and fresh strawberries is incredibly satisfying. The flavors blend together so seamlessly, creating a sweet, and fresh dessert.
Ingredients
Cheesecake filling:
- 16 oz Cream cheese
- 16 oz Heavy cream
- 1 3/4 cups Powdered sugar sifted
- 2 1/2 tsp Vanilla extract imitation
- 1/4 cup Cookie butter biscoff
- 1/4 tsp salt
Seperate fillings:
- 8.8 oz Crushed biscoff cookies 1 package
- 16 oz Diced fresh strawberries
- Melted biscoff for layering
Toppings:
- Biscoff spread for drizzle
- Extra biscoff cookies
- Sliced strawberries
- Edible glitter optional
Instructions
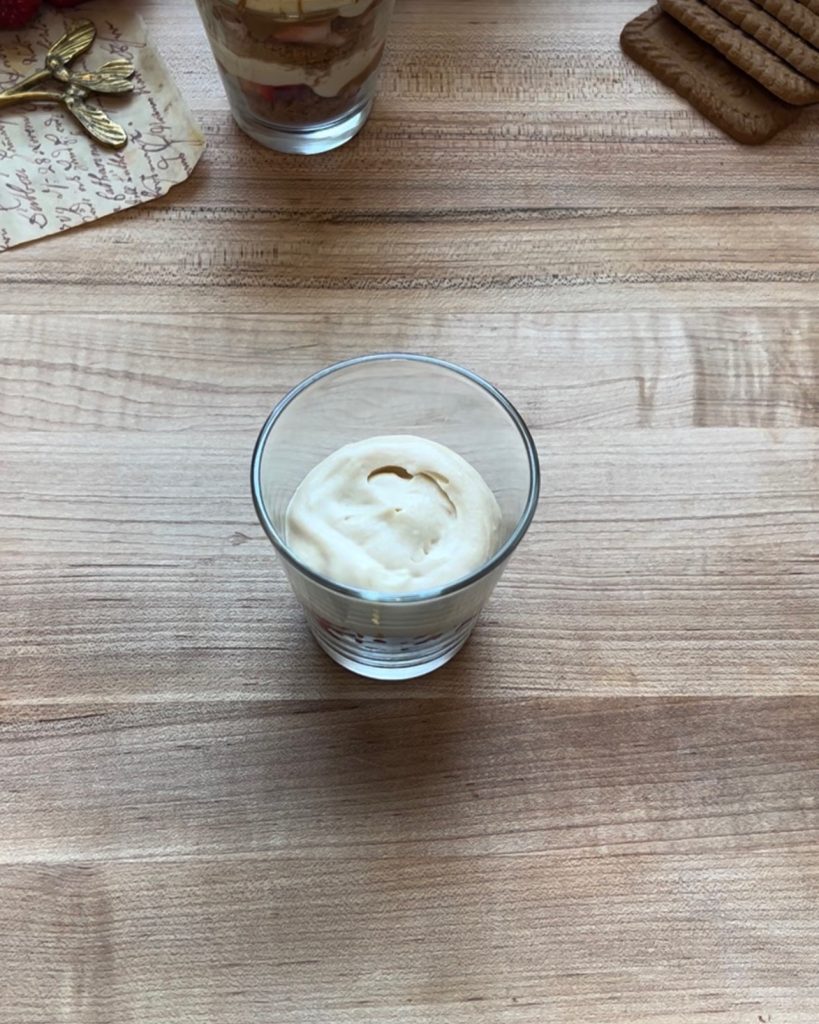
Cheesecake filling:
- In a large bowl or the bowl of a stand mixer, pour the whipped cream and beat on high speed until stiff peaks form. This usually takes around one minute.
- Add in your cream cheese, mix until fully incorporated and creamy.
- In the same bowl, add your sifted powdered sugar and mix.
- Now, add in your vanilla extract, salt, and cookie butter – whisk everything together until everything is fully incorporated. Should take about a minute.
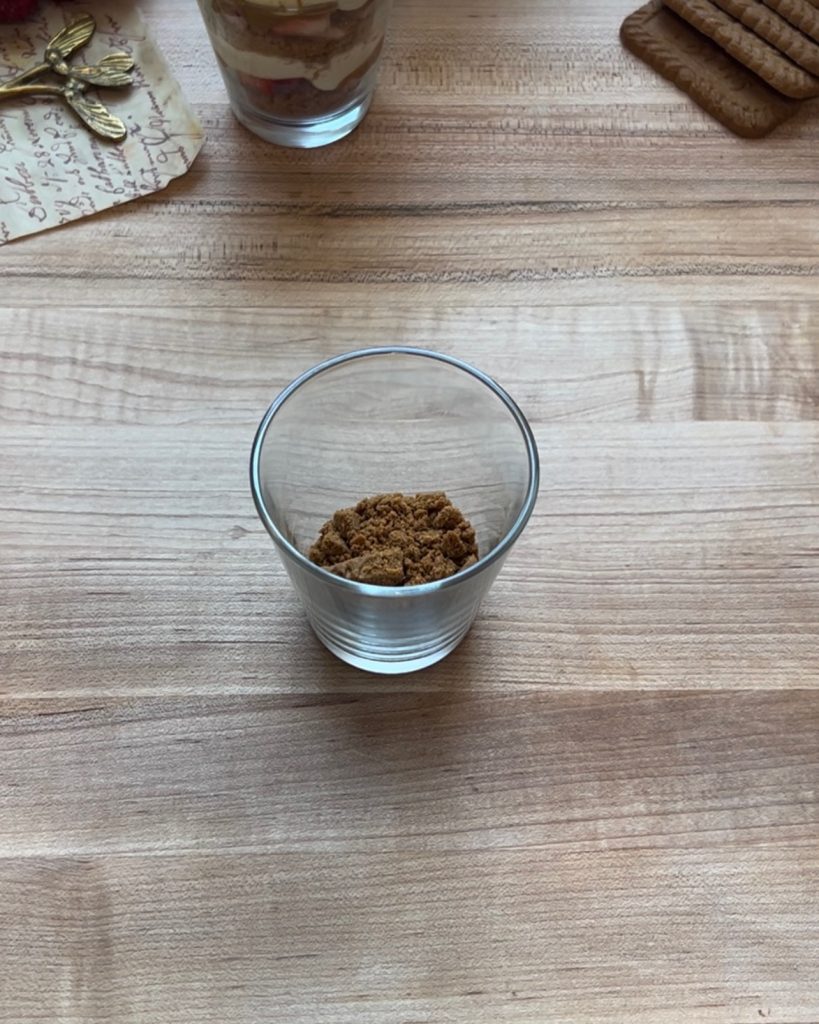
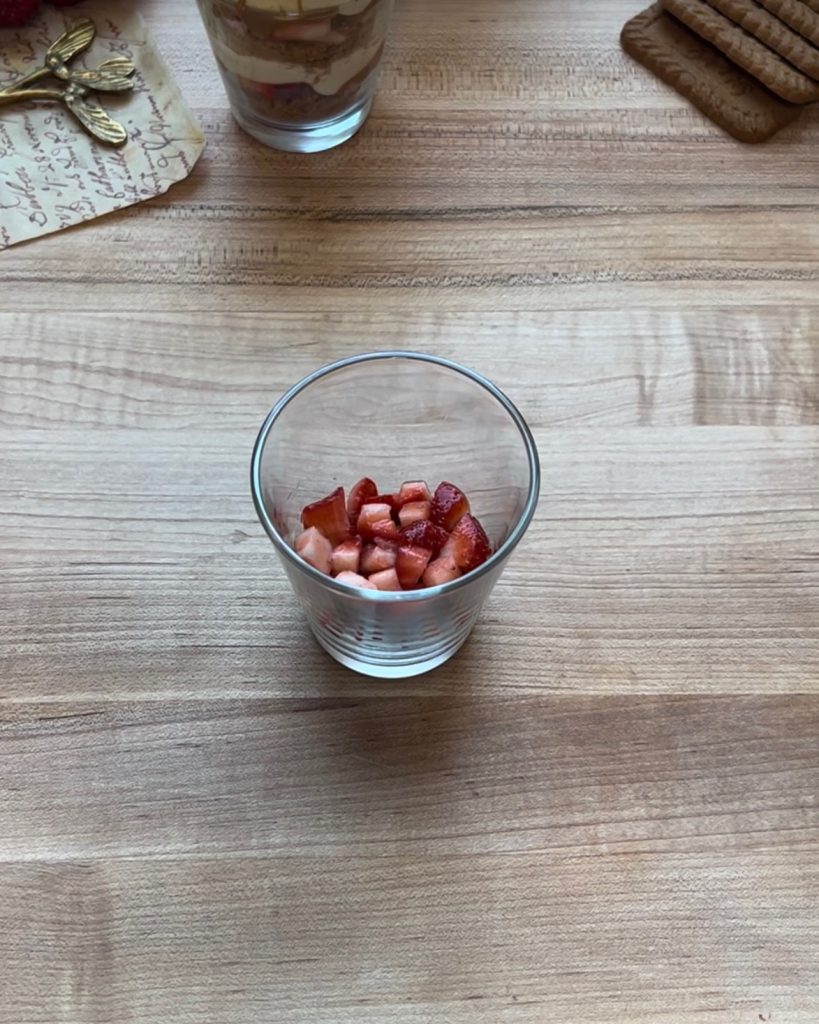
Layer your cups:
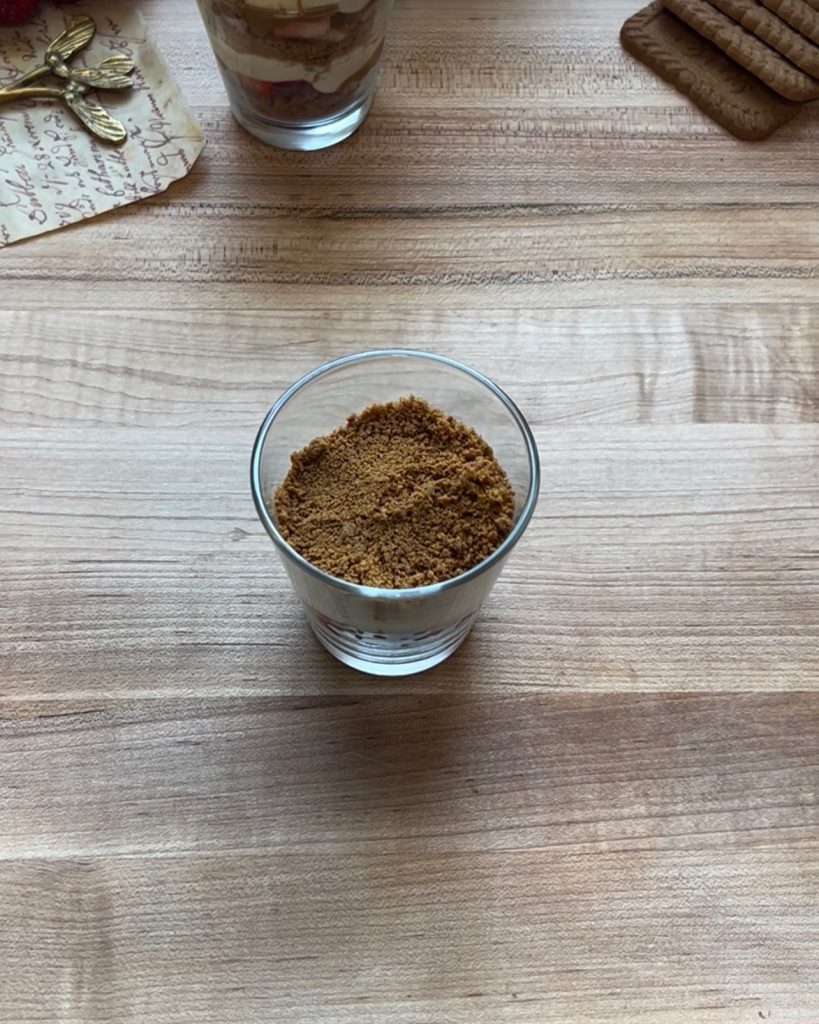
- Add about 2-3 tbsp of crushed biscoff cookies to the bottom of your cups.
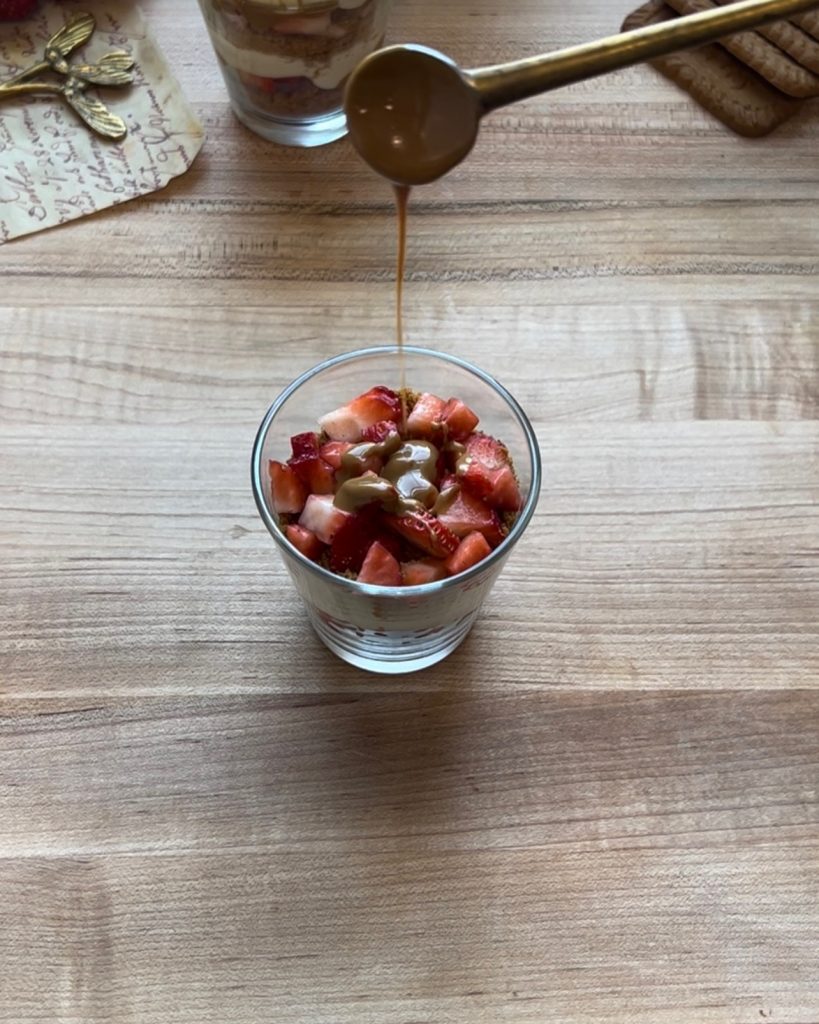
- Add a happy layer of your strawberries.
- Drizzle some melted cookie butter over your strawberries. The amount is up to you.
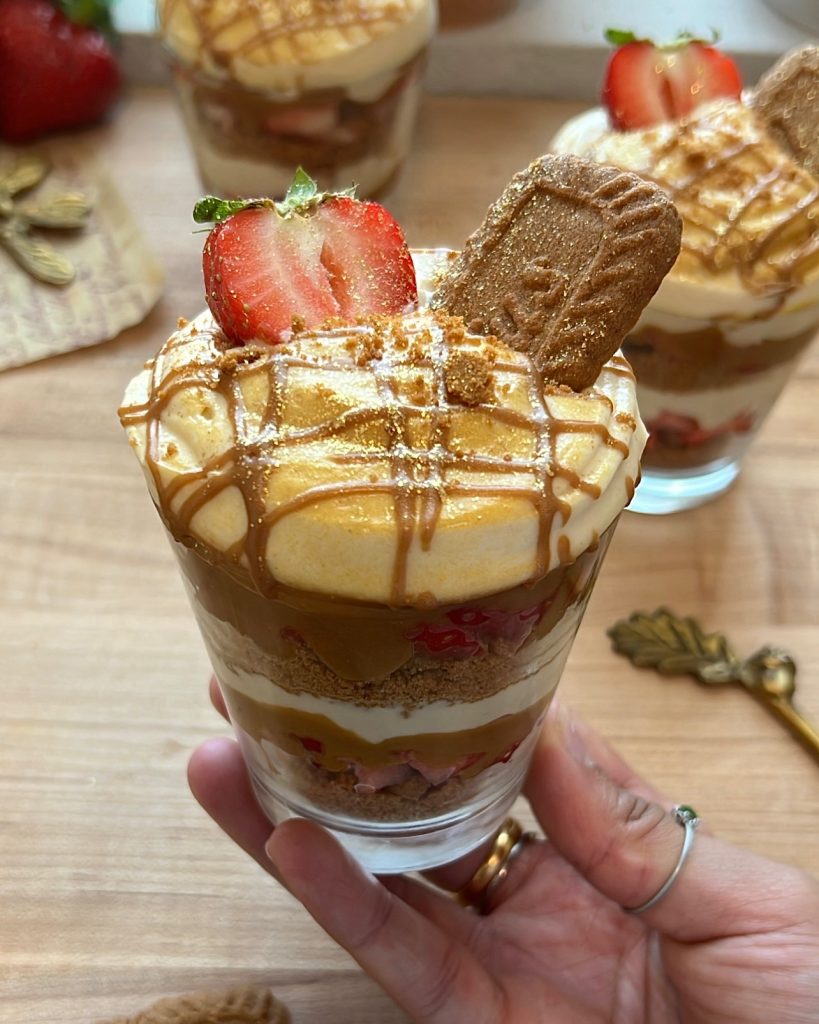
- Not necessary, but If desired; Transfer your cheesecake mixture into a piping bag for an elegant presentation. Alternatively, evenly divide the mixture among the cups and spoon it in for a simpler approach.
- Now, repeat each step one more time.
- After you’ve layered your cups, top your cheesecake filling layer with your desired toppings – or the toppings I have listed above.
- Once prepared, cover the cups and refrigerate them for at least an hour before serving (I prefer to refrigerate them the night before). Chilling allows the flavors to meld together and the cheesecake filling to set properly. The colder they are, the better they are going to taste as well.
- Remember: The number of servings you'll yield depends on the portion size of each layer. If you're more conservative with the amounts, you'll be able to create more cheesecake cups. Conversely, if you're more generous with each layer, the number of cheesecake cups will be reduced.
1 Comment
Join The Conversation


everyone loved it and it was so easy to make